
Painting Textured Walls - Tips & Tricks
Should I Paint That: Painting Textured Walls

Accent walls have become very popular in interior design recently. Many modern styles focus on flat colored walls, but adding texture can make your home stand out in a unique way. While popcorn ceilings often come to mind when thinking of textured paint, there are many other options available.
Different techniques for Painting Textured Walls:
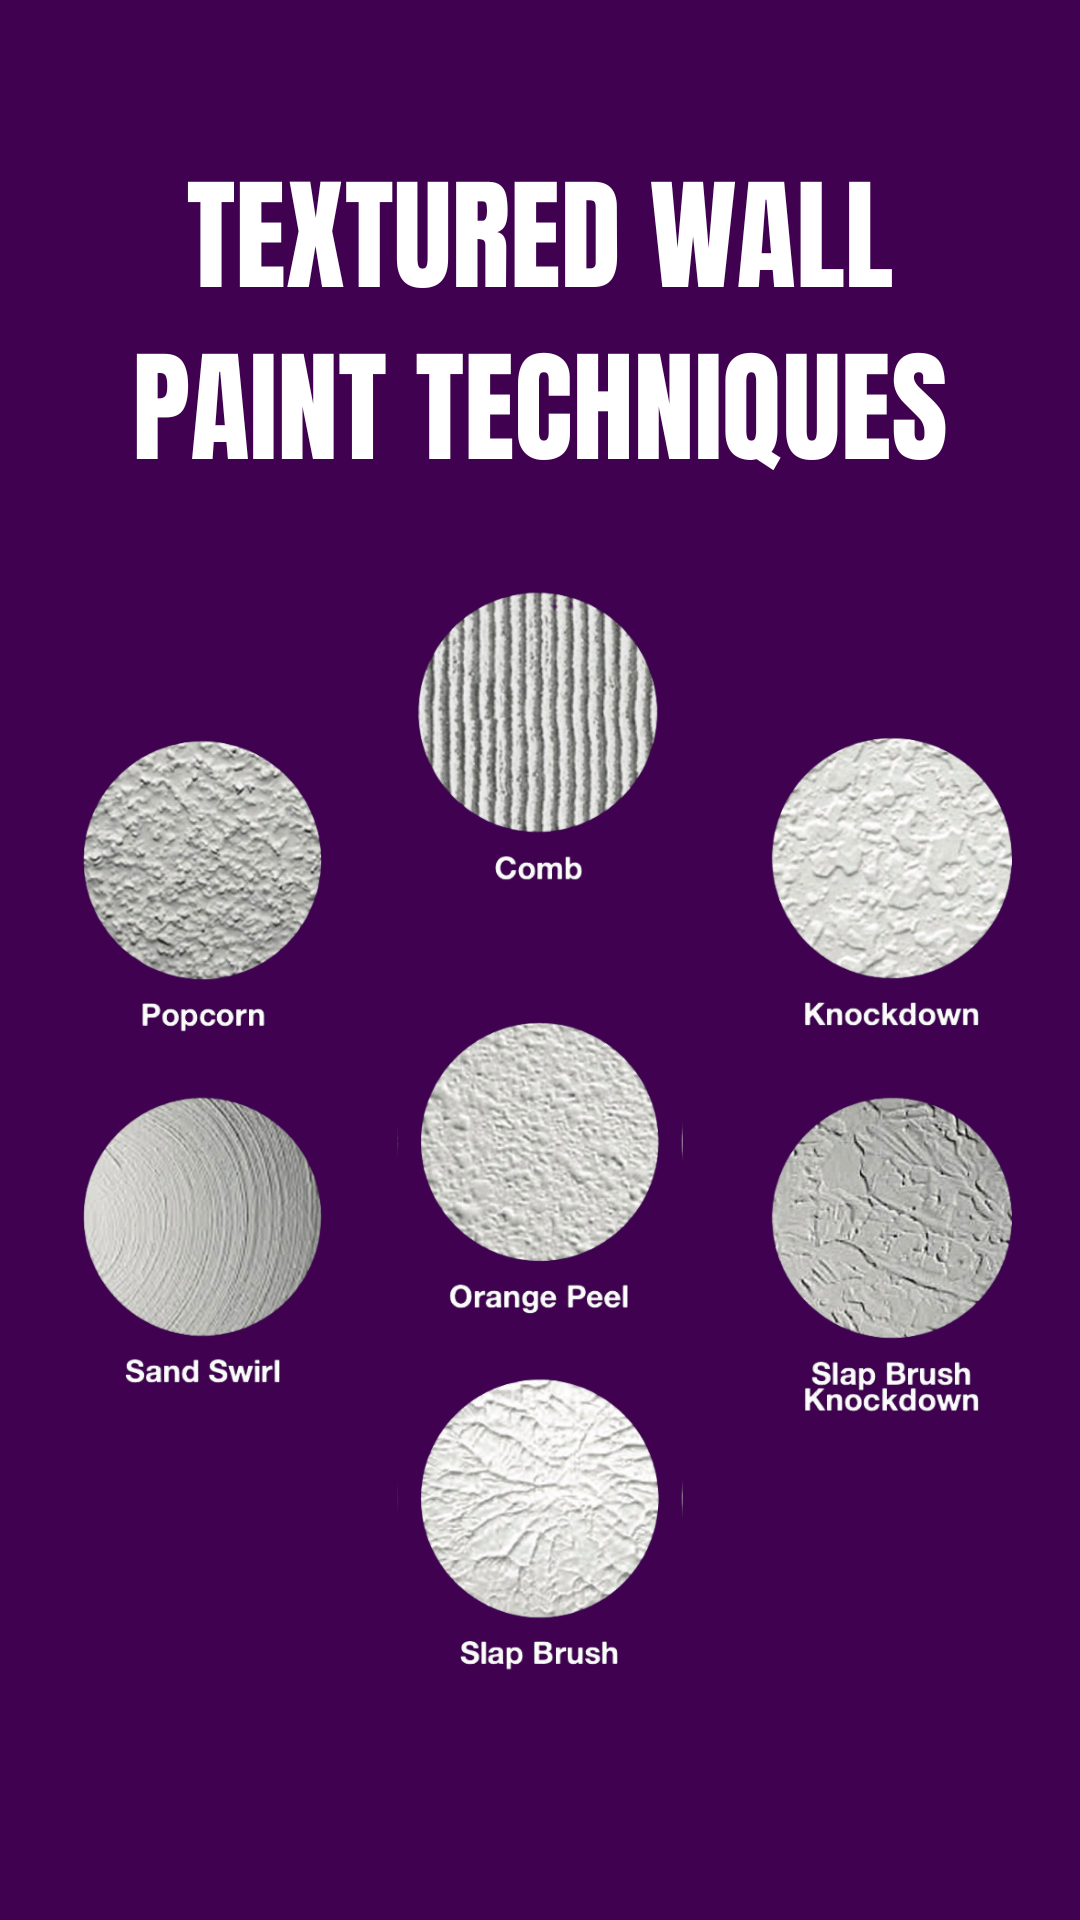
Comb - Uses lines of various widths and shapes to produce a series of rainbow patterns.
Popcorn - A style since the 70’s, this technique is popular for hiding imperfections and absorbing sounds.
Orange Peel - It's all in the name, this texture will resemble that of an orange peel.
Knockdown - Similar to stucco in aesthetic, this unique pattern can be created with just an extra step added to the orange peel technique.
Sand Swirl - A technique using perlite - a primer with sand mixed in - that will give you beautiful swirl patterns without being too disruptive to the room.
Slap Brush - A technique that uses its namesake to create thin line patterns adding an individualistic design to any room.
Slap Brush Knockdown - This texture combines the slap brush technique with the flattening step of the knockdown texture to create a random pattern of flatter, wider lines, instead of peaked, thin lines
Ready to add paint textured walls in your home and are unsure of how to do it or where to start? Here at PaintPositive we have lots of experience and have a fine-tuned process to get the fresh textured look you want. We even know how to get that nice, crisp, fresh line between the wall and the ceiling. Some of our tips and tricks to achieve quality results:
Use good quality painter's tape to achieve straight lines. It makes cutting lines easier.
Tip: Start with a small brush. Be careful when fixing wall spaces (like filling holes or sanding), as it can create flat spots needing further repair. If you get a flat spot, try aerosol wall texture spray from a local hardware store; it's easy to use.
When painting textured walls, choose matte paint over gloss, as gloss highlights the texture. Use a fluffy roller for better coverage on textured surfaces.
Life Hack: If you have both textured ceilings and walls, consider adding crown molding for a clean line. Textured walls may need two to three coats, as they absorb paint quickly.

Painting is tricky, but with the right knowledge, it doesn’t have to be. At Paint Positive, the know-how is our job, and you can trust that we have the skills and knowledge to get it done right on-time, every time.